The Radiators command is used to insert different types of radiators to the drawing. Views for designing cross-sections and strand diagrams.
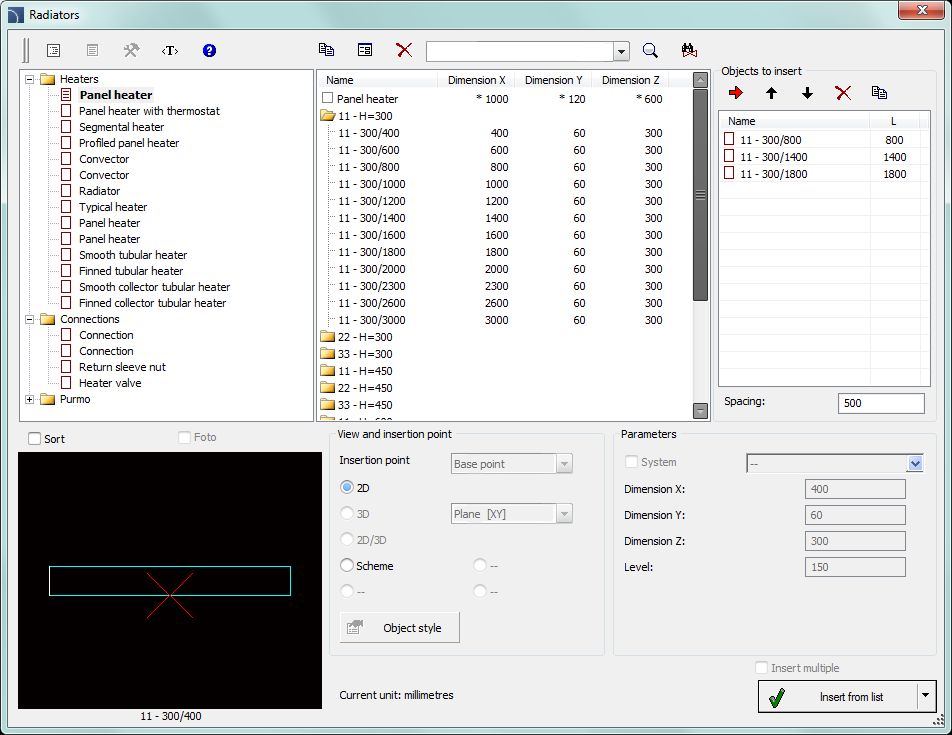
In the dialog window, databases with radiators catalogs. Radiators dimensions can be determined by the user (but only for the first element from the list). Other radiators have a specified type, that's why their dimensions shouldn't be changed.
This command gives user the ability to create a list of Objects to insert, thanks to which it is possible to add several different radiators simultaneously to the drawing.

Radiators dialog window
Radiators dialog window contains many options that are described in the Parametrical armature chapter. Additional options allow to specify objects dimensions and to create a list of inserted radiators:
Objects to insert - list
of objects that will be inserted into the drawing. The objects order can be
changed with the help of move selected rows up  , move selected rows down
  buttons.
The Add
element to a list  button adds
object to the list of objects to insert.
Spacing - specifies the distance between objects that will be inserted.
6 Procedures
1.
Run the Radiators  command.
2. In the dialog window select the appropriate category. After that the element preview will be displayed and on the detailed list you will be able to see all available element types and sizes.
3. (Optional) If the list of available types possesses subcategories double click on a category will expand it and you will be able to see its content.
4. (Optional) Right click on any item and from the menu choose the Expand all/Collapse all option.
5. Choose the needed element form the detailed list.
6. (Optional) Change the View for the selected element.
7.
In order to add an element to the list of objects to insert, double click on the
chosen element or click the Add element to a list
 button.
8. Continue with filling the list by repeating the steps 2 - 7.
9.
(Optional) Select the element from the list of Objects to
insert and with the help of the Copy  , Delete
  buttons, copy or delete a selected element
from the list.
10.
(Optional) Select the element from the list of Objects to
insert and with the help of the move selected rows up  , move selected rows down
  buttons change the order of element in the
list.
11. Specify the spacing of inserted objects.
12. Click the OK button to insert objects into the drawing.
13. Specify the insertion point and the objects rotation angle.
1.
Run the Radiators  command.
2. In the dialog window select the appropriate category. After that the element preview will be displayed and on the detailed list you will be able to see all available element types and sizes.
3. Select an object from the detailed list. Field that allows you to specify dimensions will be activated.
4. Specify dimensions.
5. Click the OK button to insert object into the drawing.
6.
(Optional)Click the Add element to a list  button to add an element with specified
dimensions to the list of Objects to insert.
It is also possible to save the user dimensions by Creating and extending the user type of series Creating and extending user type of series.